Imagine walking through your home and seeing not just what’s there, but what could be. That scratched-up chair in the corner, the cracked pitcher on the shelf, or the pile of unused drawers in the garage—they’re not junk. They’re opportunities. Upcycling is the craft of taking these overlooked items and turning them into something beautiful, useful, and entirely your own. It’s not just a decorating trick; it’s a way to reimagine your space while breathing fresh life into the old and forgotten.
In this article, we’ll guide you through the exciting world of upcycling for home décor. You’ll learn why it’s worth doing, how to get started, and plenty of creative ideas to fuel your projects. Whether you’re a beginner or a seasoned DIYer, there’s something here for you—no fancy skills required, just a spark of curiosity. Upcycling can save you money, cut down on waste, and make your home a gallery of your own creativity. Let’s dive in and uncover the magic of giving new life to old objects!

Why Upcycling Is a Decor Game-Changer
Upcycling is more than a buzzword—it’s a practical and rewarding approach to decorating. Here’s why it deserves a spot in your home:
-
- Sustainability Made Simple: When you upcycle, you keep items out of landfills and reduce the need for new, mass-produced goods. It’s an easy way to live greener.
-
- Affordable Flair: Forget splurging on pricey décor—upcycling lets you refresh your space using what you already have or can find on a budget.
-
- One-of-a-Kind Vibes: Handcrafted pieces carry a charm that store-bought items can’t match. Your home becomes a showcase of your personality.
-
- Sentimental Value: Revamping an old family keepsake or a thrift store gem adds a story to your décor that’s uniquely yours.
Think of upcycling as a treasure hunt where the prize is a home that feels both fresh and meaningful. Ready to hunt? Let’s find your starting point.
Step 1: Spotting Upcycling Potential
The journey begins with finding the right objects to transform. You don’t need to look far—hidden gems are closer than you think.
Where to Hunt
-
- Around Your Home: Peek into storage spaces—old lamps, worn-out trays, or outdated furniture might be waiting for a makeover.
-
- Secondhand Hotspots: Thrift shops, garage sales, or flea markets offer quirky finds at low prices.
-
- Online Freebies: Check local listings on platforms like Craigslist or community groups for castoffs others want gone.
-
- Outdoor Inspiration: Pick up natural materials like driftwood or pinecones for an earthy touch.
What to Pick
Focus on items with solid foundations—sturdy frames, interesting textures, or durable materials. Scratches or stains? No problem—those are fixable.
Quick Tip: New to this? Start small with something like a candleholder or a wooden box to get the hang of it.
Step 2: Building Your Upcycling Kit
You don’t need a pro-level setup—just a handful of tools to bring your vision to life.
Must-Have Basics
-
- Sandpaper or a Sander: Smooths surfaces and preps them for paint or stain.
-
- Paints and Brushes: Grab acrylic or chalk paint for versatility.
-
- Adhesives: Strong glue or epoxy for sticking things together or patching cracks.
-
- Screwdriver/Drill: Great for assembling or tweaking furniture.
-
- Cutting Tools: Scissors or a craft knife for trimming fabric or paper.
-
- Safety First: Gloves, goggles, and a mask to keep you protected.
Nice-to-Have Extras
-
- Stencils: For crisp designs or lettering.
-
- Textiles: Old fabric scraps for upholstery or accents.
-
- Decoupage Supplies: Pretty paper and glue for layered finishes.
With these in hand, you’re ready to roll up your sleeves and get creative.
Step 3: Upcycling Projects to Ignite Your Imagination
The heart of upcycling is experimentation. Here are some fresh ideas to kickstart your projects:
1. Old Suitcase to Chic Side Table
-
- How: Paint a vintage suitcase, attach four short legs (think wooden dowels or salvaged furniture feet), and secure them with screws.
-
- Use: A quirky bedside table with storage inside for books or blankets.
2. Wine Cork Bulletin Board
-
- How: Glue collected wine corks into a rectangular frame (use an old picture frame or make one from scrap wood).
-
- Use: Pin notes, photos, or recipes in your kitchen or office.
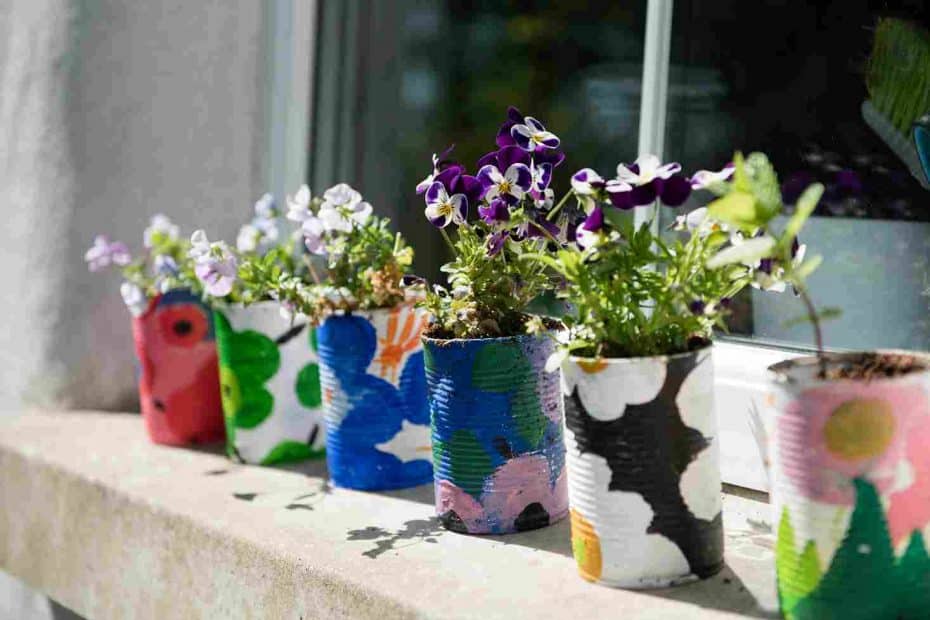
3. Broken Drawer Planters
-
- How: Line an old drawer with plastic, fill with soil, and plant succulents or herbs. Paint the outside for a pop of color.
-
- Use: A rustic centerpiece for your patio or dining table.
4. Vintage Book Wall Shelves
-
- How: Secure hardcover books to the wall with brackets underneath—stack them or space them out.
-
- Use: Display small trinkets or lightweight décor in a cozy reading nook.
5. Tin Tray Gallery Wall
-
- How: Paint old metal trays in bold colors, then hang them in a cluster on the wall.
-
- Use: A funky, retro accent for your living room or hallway.
6. Pallet Wood Coat Rack
-
- How: Sand a section of a wooden pallet, add hooks along the top, and mount it on the wall.
-
- Use: A rustic entryway organizer for coats, hats, or bags.
These ideas are launching pads—tweak them to fit your style and materials.
Step 4: Perfecting Your Project
The magic often lies in the细节—here’s how to make your upcycled piece pop:
-
- Paint Play: Experiment with a weathered look (sand edges after painting) or a two-tone effect for depth.
-
- Hardware Upgrade: Swap out rusty screws or knobs for sleek, modern ones—or go bold with mismatched vintage finds.
-
- Textural Add-Ons: Glue on rope, lace, or burlap for extra character.
-
- Protect It: Apply a sealant (like varnish or wax) to lock in your work and keep it lasting.
Try This: Test your finishing touches on scrap material first to nail the vibe you’re after.
Troubleshooting Upcycling Hiccups
Not everything goes smoothly—here’s how to tackle common snags:
-
- Wobbly Structures: Reinforce with extra screws or brackets.
-
- Peeling Paint: Prep better next time—clean, sand, and prime slick surfaces.
-
- Creative Block: Step back, sip some tea, and flip through a magazine or two for a spark.
Mistakes are part of the fun—they teach you what works.
The Joy of Upcycling
Upcycling isn’t just about the finished piece—it’s the journey there. It’s the thrill of seeing an old thing become new, the quiet pride of fixing something yourself, and the coziness of a home filled with your handiwork. Every project you complete weaves a bit more of your spirit into your space.

Your Upcycling Journey Begins Now
No need to redo your whole house—just pick one item that’s been sitting idle. Maybe it’s that chipped mug or that rickety stool. Grab your tools, play with an idea, and watch it transform. Each upcycled creation is a win—for your wallet, the planet, and your home’s soul. What’s calling your name first?